Configure Kubernetes API Server to Trust OIDC Provider
The Kubernetes API server can trust an OIDC provider to authenticate users. We recommend that you work with your Kubernetes administrator and security team when you configure this integration. The exact steps vary by infrastructure provider and Kubernetes platform, such as AWS EKS, Azure AKS, or Google GKE.
Refer to the following configuration guides for common Kubernetes platforms:
OIDC Configuration Prerequisites
-
Administrator access to the Kubernetes API server.
-
You need network access to the following systems:
-
The Kubernetes API server.
-
The OIDC provider.
-
-
The Kubernetes API server must have network access to the OIDC provider.
-
You must have the following information available from the OIDC provider:
-
Issuer URL.
-
Username claim, typically
emailorsub. -
Groups claim, typically
groups. -
Username prefix.
-
Your OIDC provider may require additional configuration that is not listed in these prerequisites. Review the Kubernetes API server OIDC options documentation for a complete list of configuration options.
Configure the Kubernetes API Server to Trust the OIDC Provider
Use this guide to try a kind cluster that trusts the Dex instance deployed by PaletteAI. You can apply the same steps to a production cluster and your own OIDC provider.
Prerequisites
-
Install
kindv0.27.0 or greater. -
Download and install ngrok.
- Once
ngrokis installed, complete the post-installation instructions for logging in and configuring yourauthtoken.
- Once
-
Install Kubelogin v1.31 or greater to use the OIDC login command. If you are using a Kubernetes plugin manager, such as
krew, make sure to update the plugin to the latest version through the plugin manager. You can check the version you have installed by issuingkubectl oidc-login version.
Enablement
-
Create a directory for the demo setup.
mkdir -p paletteai-oidc-demo/ssl && cd paletteai-oidc-demo -
Use
ngrokto open a secure agent tunnel between your local machine and the dynamic endpoint provided byngrok.ngrok http https://localhost:5554An agent tunnel summary appears in your terminal and displays your dynamic endpoint. In this example, the endpoint is
https://4464-72-217-54-22.ngrok-free.app, but your value is different.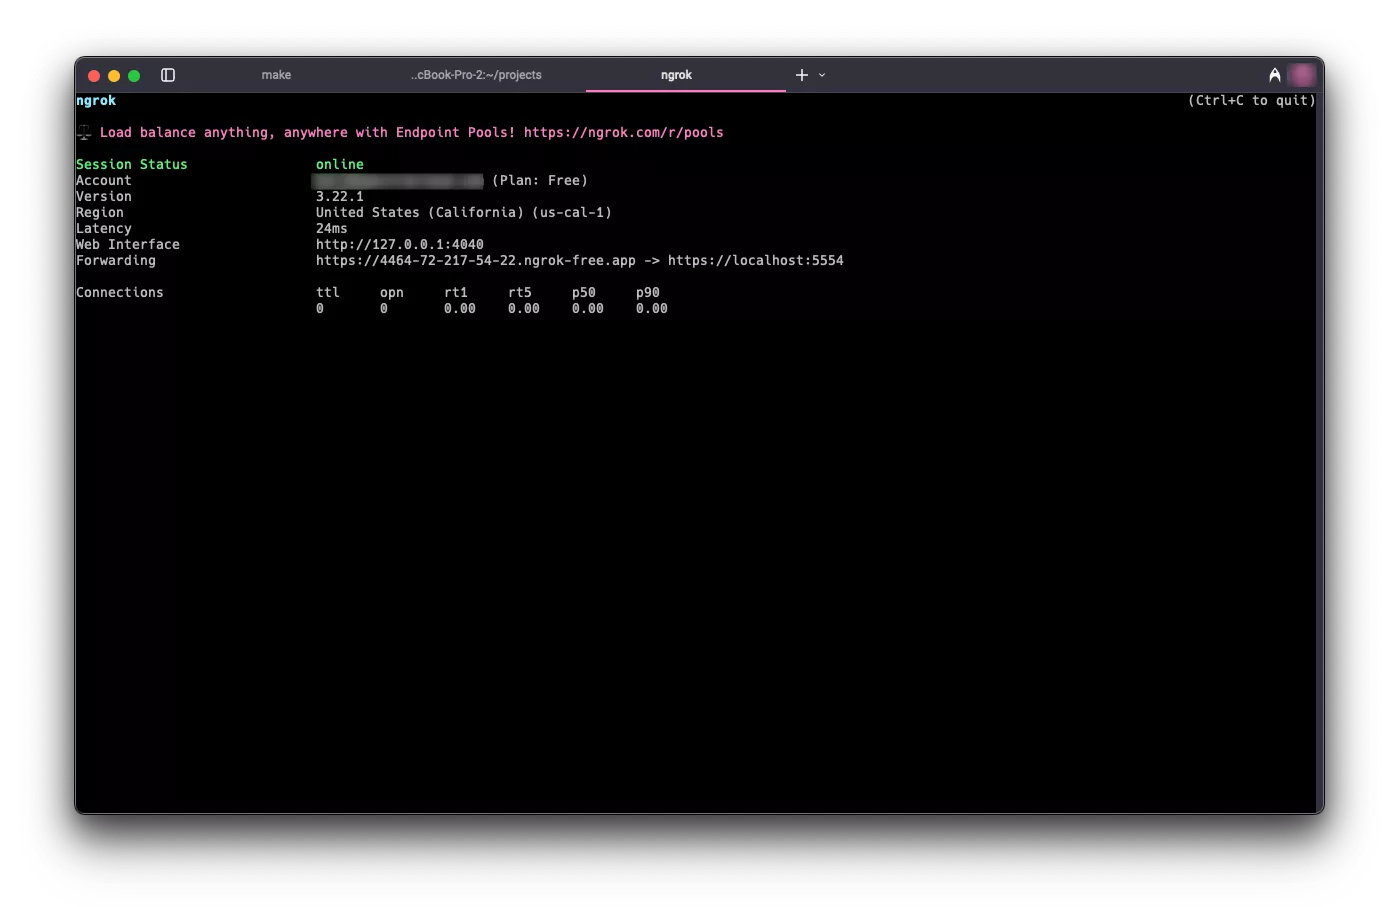
Copy the endpoint and export it as an environment variable.
export NGROK_ENDPOINT=<your-ngrok-endpoint> -
Create a
kind-config.yamlfile with Kubernetes API server configuration. TheapiServer.extraArgssection configures the Kubernetes API server to trust the OIDC provider. In this example,oidc-issuer-urluses thengrokendpoint you set in$NGROK_ENDPOINT.cat <<EOF > kind-config.yaml
kind: Cluster
apiVersion: kind.x-k8s.io/v1alpha4
networking:
apiServerAddress: '127.0.0.1'
apiServerPort: 6443
nodes:
- role: control-plane
kubeadmConfigPatches:
- |
kind: ClusterConfiguration
apiServer:
extraArgs:
oidc-issuer-url: $NGROK_ENDPOINT
oidc-client-id: kubernetes
oidc-username-claim: email
oidc-username-prefix: ""
oidc-groups-claim: groups
EOF -
Create the
kindcluster.kind create cluster --name dev --kubeconfig $HOME/dev.kubeconfig --config kind-config.yamlExample OutputCreating cluster "dev" ...
✓ Ensuring node image (kindest/node:v1.32.2) 🖼
✓ Preparing nodes 📦
✓ Writing configuration 📜
✓ Starting control-plane 🕹️
✓ Installing CNI 🔌
✓ Installing StorageClass 💾
Set kubectl context to "kind-dev"
You can now use your cluster with:
kubectl cluster-info --context kind-dev --kubeconfig /Users/demo/dev.kubeconfig
Have a nice day! 👋 -
Point
kubectlto the kubeconfig file for the new cluster.export KUBECONFIG=$HOME/dev.kubeconfig -
Create a
values.yamlfile with the Dex configuration. ThestaticClientssection defines the OAuth client that Kubelogin uses when it requests tokens from Dex for the Kubernetes API server. Theidvaluekubernetesmatches theoidc-client-idvalue inkind-config.yaml. This example also creates a demo-only local user for this guide.cat <<EOF > values.yaml
dex:
enabled: true
replicaCount: 1
commonLabels: {}
image:
repository: ghcr.io/dexidp/dex
pullPolicy: IfNotPresent
tag: ''
digest: ''
imagePullSecrets: []
namespaceOverride: ''
nameOverride: ''
fullnameOverride: 'dex'
hostAliases: []
https:
enabled: true
configSecret:
create: true
name: ''
config:
issuer: $NGROK_ENDPOINT
logger:
level: debug
format: text
storage:
type: kubernetes
config:
inCluster: true
web:
http: 0.0.0.0:5556
https: 0.0.0.0:5554
tlsCert: /etc/k8s-webhook-certs/tls.crt
tlsKey: /etc/k8s-webhook-certs/tls.key
grpc:
addr: 0.0.0.0:5557
tlsCert: /etc/k8s-webhook-certs/tls.crt
tlsKey: /etc/k8s-webhook-certs/tls.key
tlsClientCA: /etc/k8s-webhook-certs/ca.crt
telemetry:
http: 0.0.0.0:5558
enablePasswordDB: true
oauth2:
passwordConnector: local
staticClients:
- id: kubernetes
redirectURIs:
- https://dex.mural.local/callback
- 'http://localhost:8000'
name: kubernetes
secret: demo-client-secret-change-me
public: false
staticPasswords:
- email: 'oidc-demo-user@example.com'
hash: '\$2y\$12\$14X9Hz5bl8JdH5xaQQuGUe0cC./cb7n2wKGF08jm3jRjPpDkEfyAi'
username: 'oidc-demo-user'
userID: '08a8684b-db88-4b73-90a9-3cd1661f5466'
expiry:
idToken: '8h'
volumes:
- name: tls-cert-vol
secret:
secretName: mural-dex-serving-cert
volumeMounts:
- mountPath: /etc/k8s-webhook-certs
name: tls-cert-vol
readOnly: true
envFrom: []
env: {}
envVars: []
serviceAccount:
create: true
annotations: {}
name: ''
rbac:
create: true
createClusterScoped: true
deploymentAnnotations: {}
deploymentLabels: {}
podAnnotations: {}
podLabels: {}
podDisruptionBudget:
enabled: false
minAvailable:
maxUnavailable:
priorityClassName: ''
podSecurityContext: {}
revisionHistoryLimit: 10
securityContext: {}
service:
annotations: {}
type: ClusterIP
clusterIP: ''
loadBalancerIP: ''
ports:
http:
port: 5556
nodePort:
https:
port: 5554
nodePort:
grpc:
port: 5557
nodePort:
ingress:
enabled: true
className: 'nginx'
annotations:
cert-manager.io/cluster-issuer: mural
hosts:
- host: dex.mural.local
paths:
- path: /
pathType: ImplementationSpecific
tls:
- hosts:
- dex.mural.local
secretName: mural-dex-serving-cert
serviceMonitor:
enabled: false
namespace: ''
interval:
scrapeTimeout:
labels: {}
annotations: {}
scheme: ''
path: /metrics
tlsConfig: {}
bearerTokenFile:
honorLabels: false
metricRelabelings: []
resources: {}
autoscaling:
enabled: false
minReplicas: 1
maxReplicas: 100
targetCPUUtilizationPercentage: 80
nodeSelector: {}
tolerations: []
affinity: {}
topologySpreadConstraints: []
strategy: {}
networkPolicy:
enabled: false
EOFDefault
values.yamldetailsThere are a few important details in the default
values.yamlfile.The
issuervalue defines the URL Dex places in theissclaim of the tokens it issues. In this example, the value uses thengrokendpoint. In production, setissuerto the domain you assign to PaletteAI.The
staticClientssection defines relying parties that request tokens from Dex. In this example, thekubernetesclient ID matches theoidc-client-idvalue inkind-config.yaml, so Kubelogin can request a token for the Kubernetes API server. Thehttp://localhost:8000redirect URL allows Kubelogin to complete the local browser sign-in flow because it uses that callback URL by default.The
staticPasswordssection defines a demo-only local user,oidc-demo-user@example.com, with the passwordChangeMe!234. Dex supports local users, but we recommend an external identity provider for production because local users are limited in functionality and cannot be assigned a group. -
Use the
muralHelm chart to deploy Dex for this guide. This example uses themuralumbrella chart with the other Mural components disabled so the setup stays focused on the Dex-based OIDC flow.helm install mural oci://public.ecr.aws/mural/mural --version 1.1.0-rc.3 \
--namespace mural-system --create-namespace --values values.yaml --set=canvas.enabled=false --set=cert-manager.enabled=true --set=flux2.enabled=false --set=hue.enabled=false --set=fleetConfig.enabled=false --set=fleetconfig-controller.enabled=false --set=ingress-nginx.enabled=true --set=brush.enabled=false --set=zot.enabled=false --set=alertmanager.enabled=false --set=fluxcd-manager.enabled=false -
Wait for the Dex pod to be ready.
kubectl wait --for=condition=ready pod --selector app.kubernetes.io/name=dex --namespace mural-system --timeout=120s -
Expose the Dex service by setting up a port forward.
kubectl port-forward service/dex 5554:5554 --namespace mural-system >/dev/null 2>&1 & -
Start the OIDC sign-in flow and inspect the token claims returned by Dex.
kubectl oidc-login setup \
  --oidc-issuer-url=$NGROK_ENDPOINT \
  --oidc-client-id=kubernetes \
  --oidc-client-secret=demo-client-secret-change-me \
--oidc-extra-scope=email -
A browser window opens to the Dex login page. Sign in with
oidc-demo-user@example.comand the passwordChangeMe!234.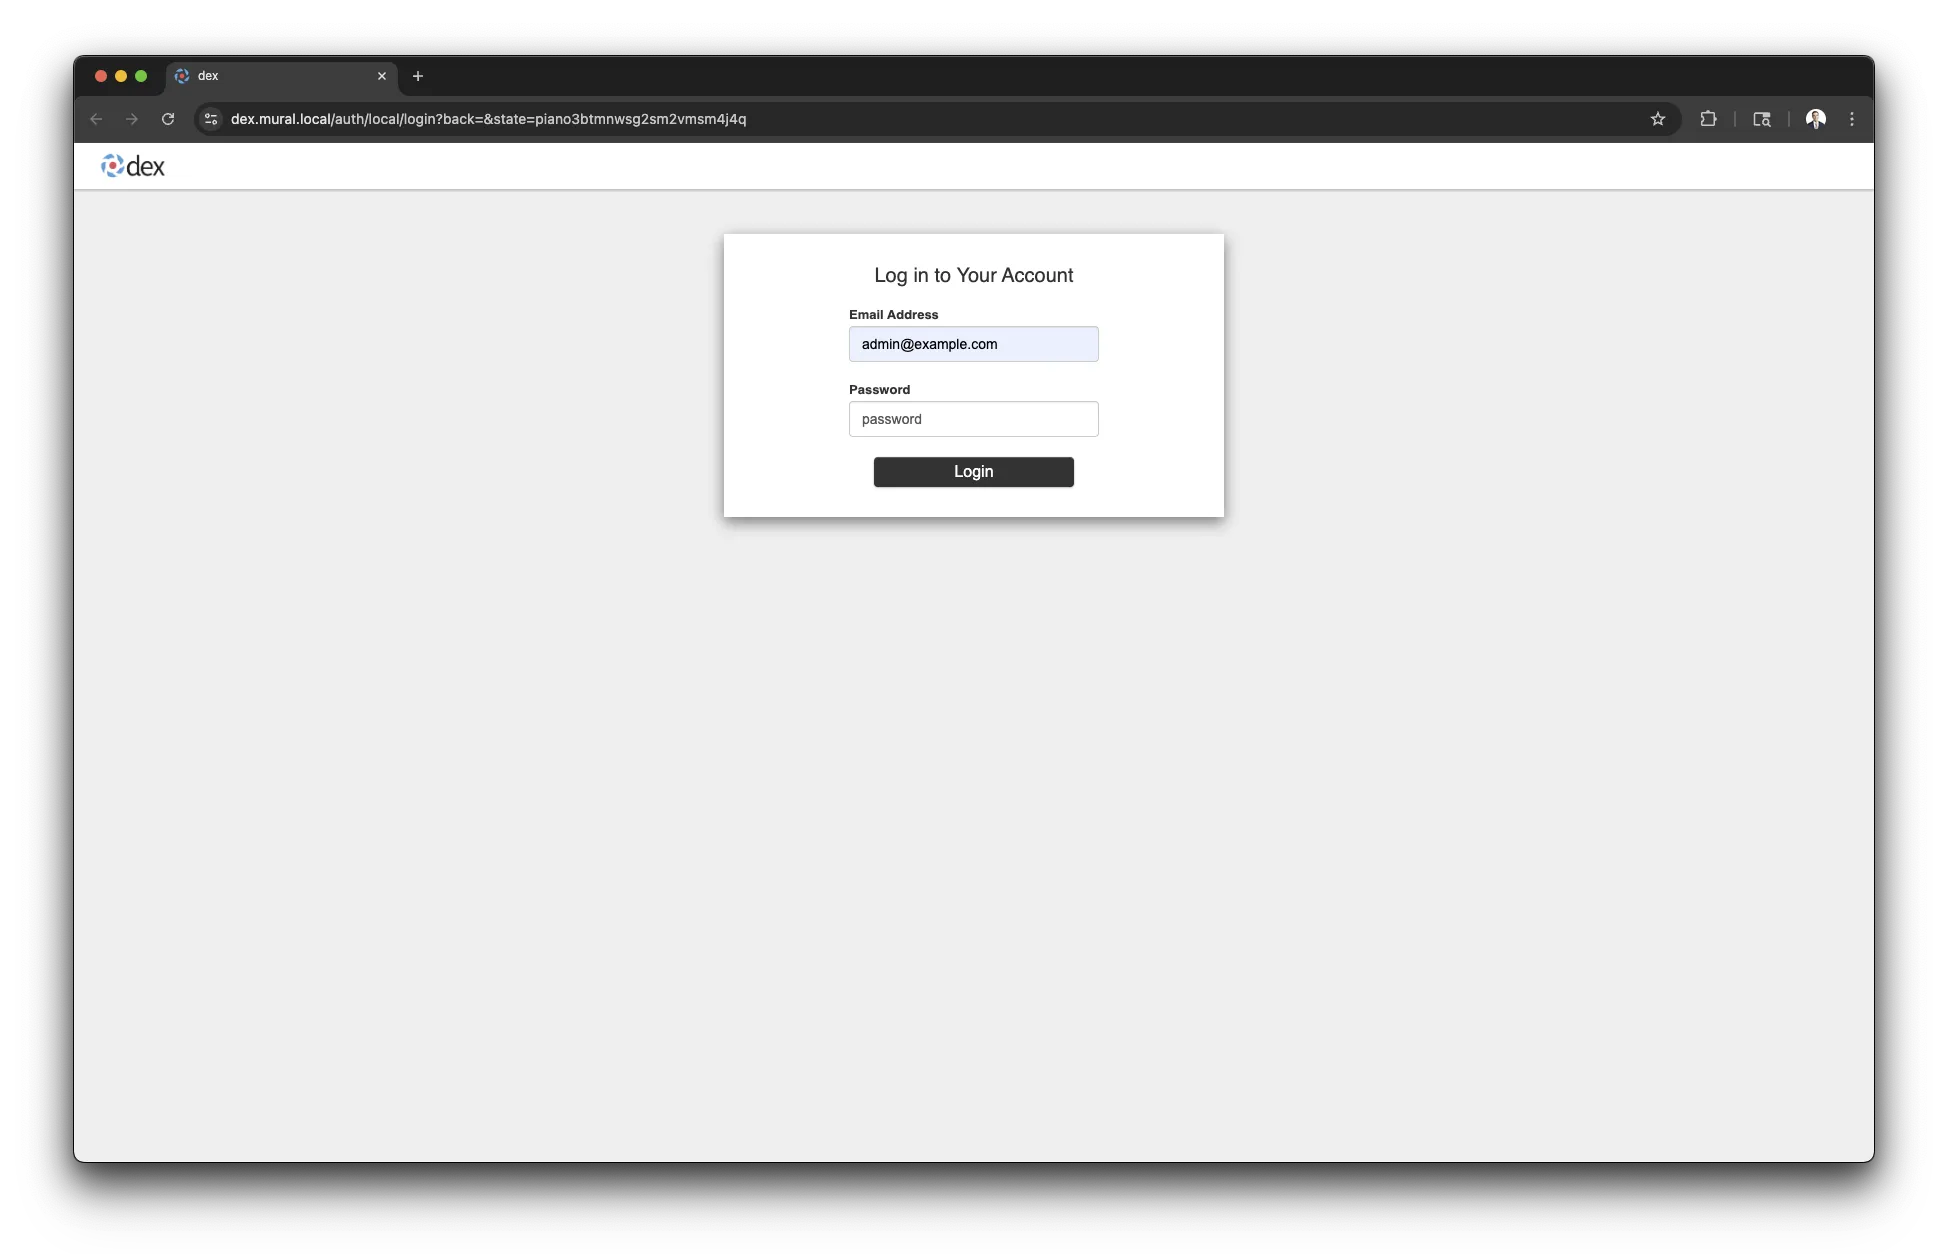
After you sign in successfully, Kubelogin displays the token claims and example kubeconfig commands.
Example OutputAuthentication in progress...
## Authenticated with the OpenID Connect Provider
You got the token with the following claims:
{
"iss": "https://4464-72-217-54-22.ngrok-free.app",
"sub": "CiQwOGE4Njg0Yi1kYjg4LTRiNzMtOTBhOS0zY2QxNjYxZjU0NjYSBWxvY2Fs",
"aud": "kubernetes",
"exp": 1747928601,
"iat": 1747842201,
"nonce": "cd5zFM0VCCIUa4RA1Phcfpl4mBC9Tfbl1pawD2dCWRk",
"at_hash": "WrpeK3mWeNLwWlGEer3ZfA",
"c_hash": "DdnjC7om5Ajo02Owjxva4Q",
"email": "oidc-demo-user@example.com",
"email_verified": true
}
... -
Return to the terminal and run
kubectl config set-credentialsto create a user entry namedoidc.kubectl config set-credentials oidc \
--exec-api-version=client.authentication.k8s.io/v1 \
--exec-command=kubectl \
--exec-arg=oidc-login \
--exec-arg=get-token \
--exec-arg=--oidc-issuer-url=$NGROK_ENDPOINT \
--exec-arg=--oidc-client-id=kubernetes \
--exec-arg=--oidc-client-secret=demo-client-secret-change-me \
--exec-arg=--oidc-extra-scope=email \
--exec-arg=--token-cache-dir=$HOME/.kube/cache/oidc \
--exec-interactive-mode=Always -
Create a role binding that grants the new user access to the cluster. Otherwise, the new user cannot perform any actions.
kubectl create clusterrolebinding oidc-admin-binding \
  --clusterrole=cluster-admin \
--user=oidc-demo-user@example.com -
Set the current context to
kind-dev.kubectl config use-context kind-dev -
Update the current context to use the
oidcuser entry.kubectl config set-context --current --user=oidc
Validate
Use the following commands to verify that the new OIDC user has access to the cluster.
-
Confirm your active credentials.
kubectl config view --minify --output jsonpath='{.users[0].name}'infoIf you have gone through this setup before, clear the token cache for the OIDC user. Otherwise, a stale token may result in an unauthorized error.
rm --recursive --force --verbose $HOME/.kube/cache/oidc -
List pods cluster-wide to confirm access. A browser window opens to the Dex login page. Sign in with
oidc-demo-user@example.comand the passwordChangeMe!234.kubectl get pods --all-namespacesThe output is similar to the following example.
Example OutputNAMESPACE NAME READY STATUS RESTARTS AGE
kube-system coredns-668d6bf9bc-fmch5 1/1 Running 0 7m22s
kube-system coredns-668d6bf9bc-s6k55 1/1 Running 0 7m22s
kube-system etcd-canvas-dev-control-plane 1/1 Running 0 7m28s
kube-system kindnet-72rph 1/1 Running 0 7m22s
kube-system kube-apiserver-canvas-dev-control-plane 1/1 Running 0 7m28s
kube-system kube-controller-manager-canvas-dev-control-plane 1/1 Running 0 7m28s
kube-system kube-proxy-p8z67 1/1 Running 0 7m22s
kube-system kube-scheduler-canvas-dev-control-plane 1/1 Running 0 7m28s
local-path-storage local-path-provisioner-7dc846544d-j6vz9 1/1 Running 0 7m22s
mural-system cert-manager-cainjector-5c87f4477-rmwvw 1/1 Running 0 6m45s
mural-system cert-manager-fd6dcf8cb-45v8s 1/1 Running 0 6m45s
mural-system cert-manager-webhook-54cd859596-shwtq 1/1 Running 0 6m45s
mural-system dex-6dc95f9d7f-2mqpn 1/1 Running 0 6m45s
mural-system helm-controller-69b7c9dbd7-pg5zw 1/1 Running 0 6m45s
mural-system kustomize-controller-657f4fdfcd-5bqll 1/1 Running 0 6m45s
mural-system source-controller-5dc6d5d47-r9nll 1/1 Running 0 6m45s
Next Steps
Now that you have a local kind cluster configured to trust Dex as an OIDC provider and have observed the workflow, you can experiment with configuring a new kind cluster to trust your own OIDC provider.
You can also practice configuring Dex to use your OIDC provider as a connector. Refer to the Dex Connectors documentation for information about configuring different OIDC providers.
To authenticate users in the PaletteAI UI, configure the following:
-
Kubernetes must trust Dex as an OIDC provider.
-
Dex must use an OIDC provider connector configured for your OIDC provider.
As you make changes to the Dex configuration, use the same mural Helm chart configuration from this guide to update the Helm release and keep the environment focused on the Dex-based OIDC flow.
helm upgrade mural oci://public.ecr.aws/mural/mural --version 1.1.0-rc.3 \
  --namespace mural-system --values values.yaml --set=canvas.enabled=false --set=cert-manager.enabled=true --set=flux2.enabled=false --set=hue.enabled=false --set=fleetConfig.enabled=false --set=fleetconfig-controller.enabled=false --set=ingress-nginx.enabled=true --set=brush.enabled=false --set=zot.enabled=false --set=alertmanager.enabled=false --set=fluxcd-manager.enabled=false
When you are done experimenting, delete the kind cluster with the following command.
kind delete cluster --name dev
Stop the kubectl port-forward and ngrok sessions in their terminals when you are done with this guide.